
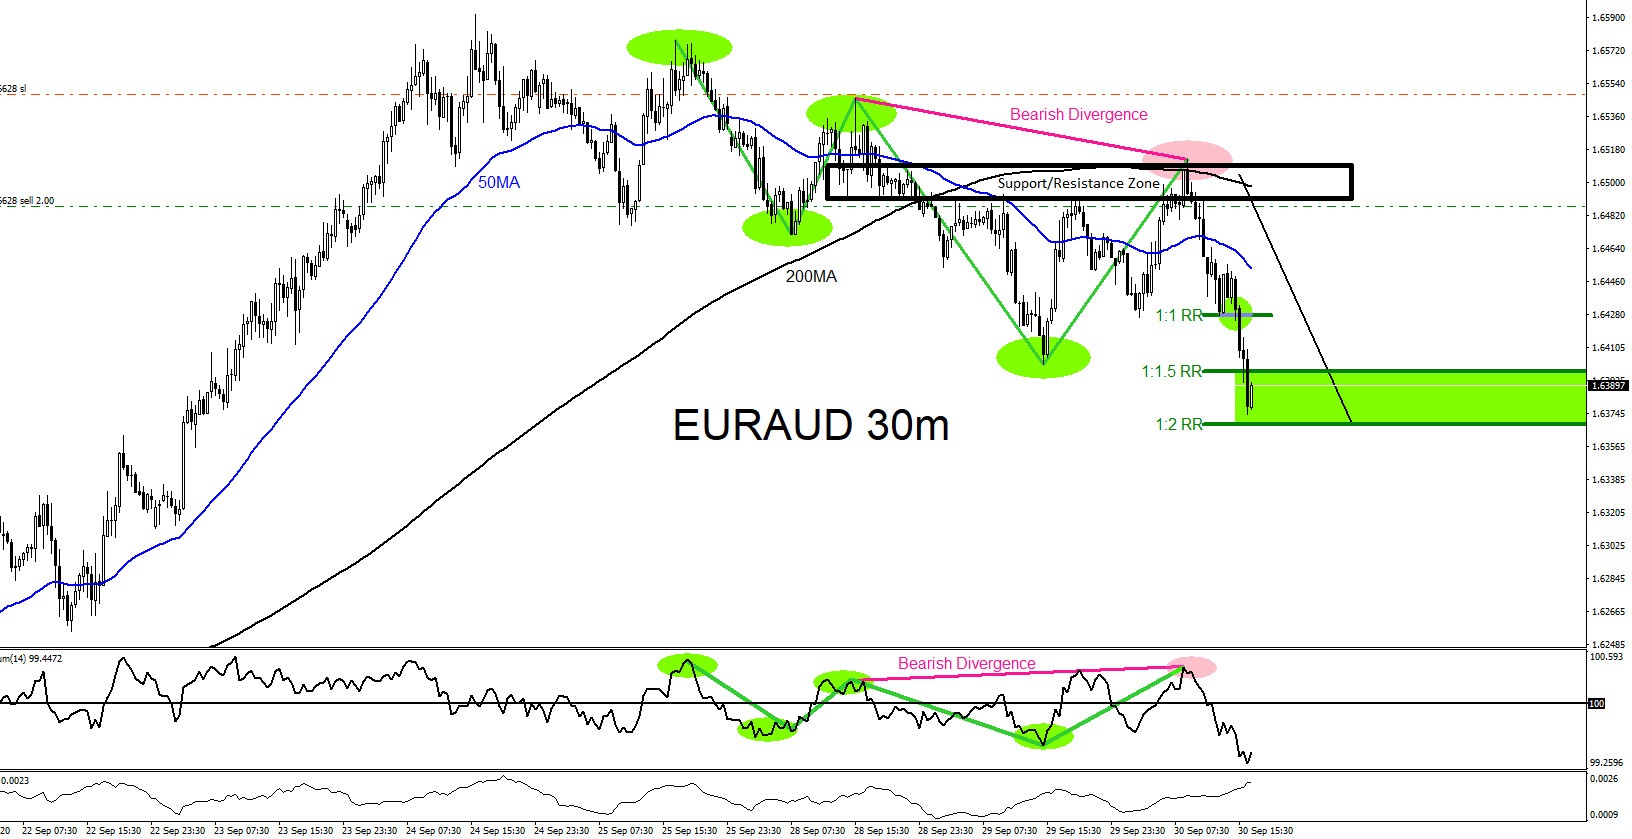
The chart below of the EURAUD pair shows clear and visible bearish signals where the pair would find SELLERS and allow a trader to get in the market. A trader should always have a minimum of 3 reasons to enter a trade. In the case of EURAUD below, first reason was that there was visible evidence of a support and resistance zone (black) where the pair respected and reversed lower from. Second reason was the pair formed a bearish divergence pattern (pink) in this zone which added more evidence that bears will be entering the market. The third added bearish evidence was when price touched, respected and stayed below the 200 Moving Average Dynamic Resistance (black) which was a sign that price would not push higher and instead reverse and push lower. The 200 Moving Average was also situated in the zone which signalled SELLERS that the support and resistance zone was a key area. SELL trade was entered when price started to push lower and stop loss was set above the top of the bearish divergence pattern start point and only a move above this level would invalidate the SELL trade. EURAUD eventually moved lower and hit the 1:1.5 RR – 1:2 RR target zone for over +100 pips. No matter what the reasons a trader uses to enter a trade a minimum combination of three evidences will always allow a trader to feel confident in entering the trade and also allow a trader to see a clearer trade setup.
EURAUD 30 Minute Chart September 30 2020
Of course, like any strategy/technique, there will be times when the strategy/technique fails so proper money/risk management should always be used on every trade. Hope you enjoyed this article and follow me on Twitter for updates and questions> @AidanFX